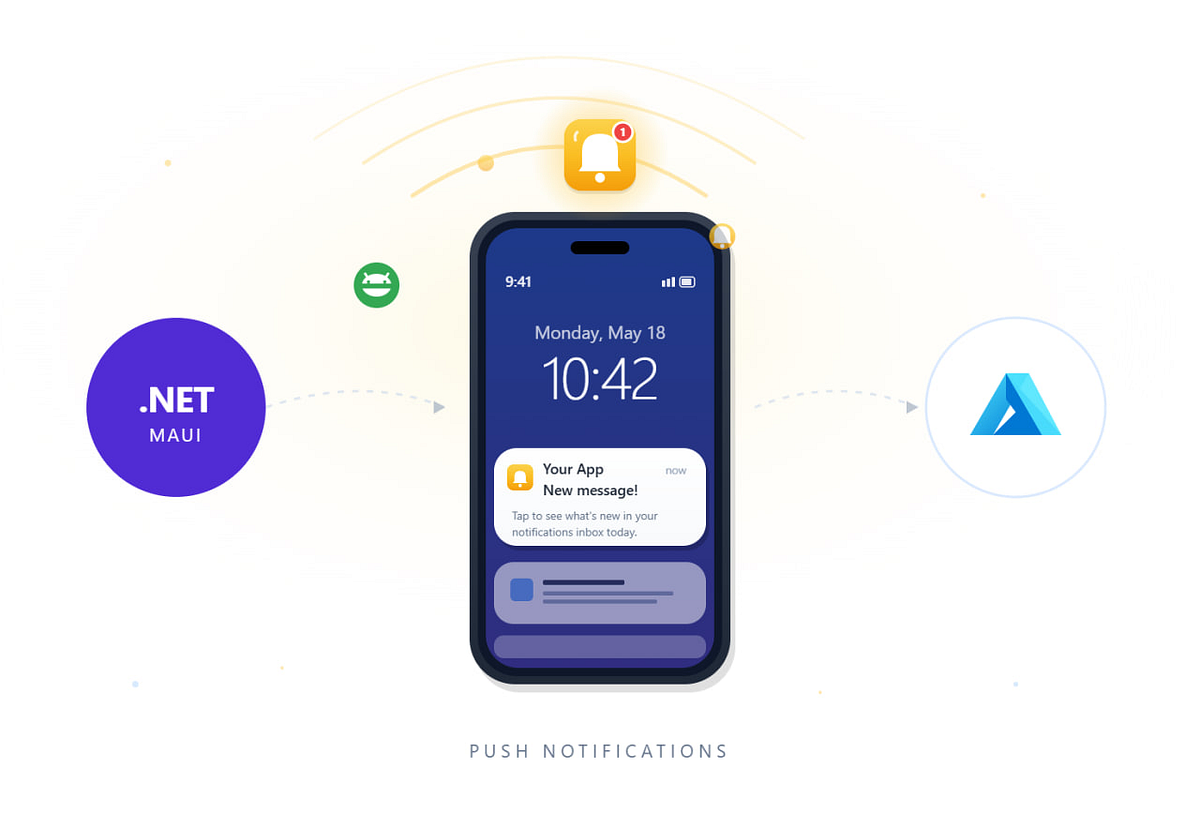
How to Implement Push Notifications for Android in MAUI Using Azure Notification Hubs


Introduction
Implementing push notifications for Android for the first time can feel confusing. There are several moving parts: generating an FCM device token, handling Android-specific requirements (notification channels, permissions, app icon rules), building the payload, and connecting everything to Azure Notification Hubs so messages can be routed and targeted correctly.
In this article, you’ll learn how to set up push notifications in a .NET MAUI Android app using Firebase Cloud Messaging (FCM) together with Azure Notification Hubs. We’ll go step by step: configure Firebase, add google-services.json, implement an Android FirebaseMessagingService to receive notifications and token updates, and register the device installation in Notification Hubs through your backend.
This guide is aimed at developers with little or no prior push-notification experience. By the end, you’ll understand the Android push flow end-to-end (token → installation registration → payload delivery), and you’ll have a clean baseline you can extend with real-world features like user tagging, version targeting, and notification history.
Azure Notification Hub Setup
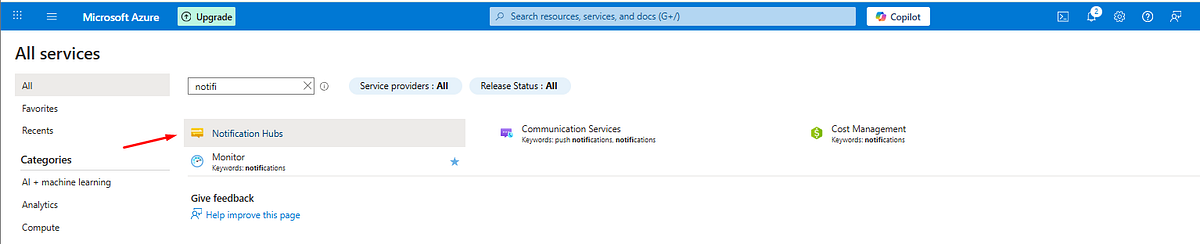
Go to the Azure Portal, open All services, and search for Notification Hubs. Click Create to start configuring a new hub.

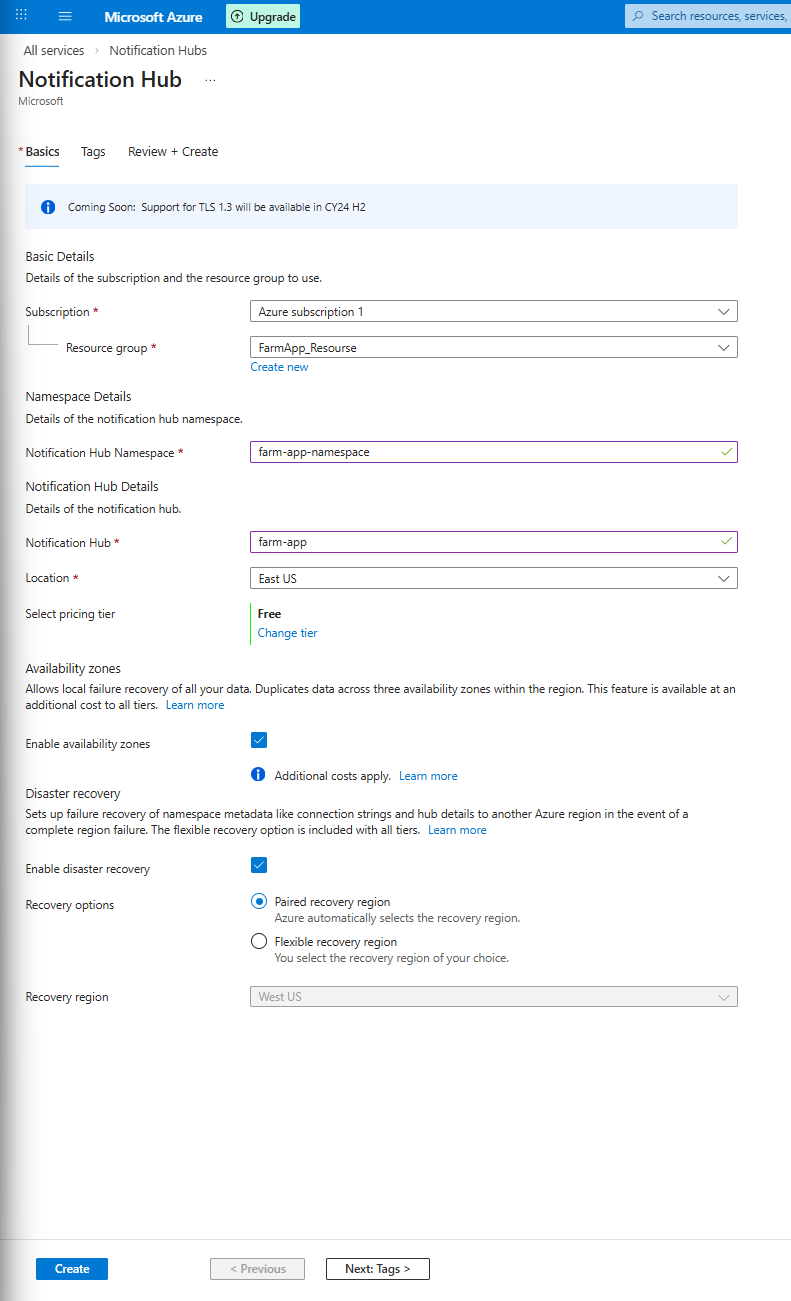
On the Basics tab, fill in the required fields:
- Resource Group — a logical container where your Notification Hub resource will be created. It helps you organize resources by environment (for example, dev or prod) and manage access and billing.
- Notification Hub Namespace — a globally unique namespace that acts as a container for one or more Notification Hubs. This is the service-level grouping.
- Notification Hub — the specific hub name inside the namespace. Your backend will use this hub to register Android devices and send push notifications.
- Location — the Azure region where the hub will be deployed. It’s recommended to select the same region as your backend/API to minimize latency and avoid cross-region issues.
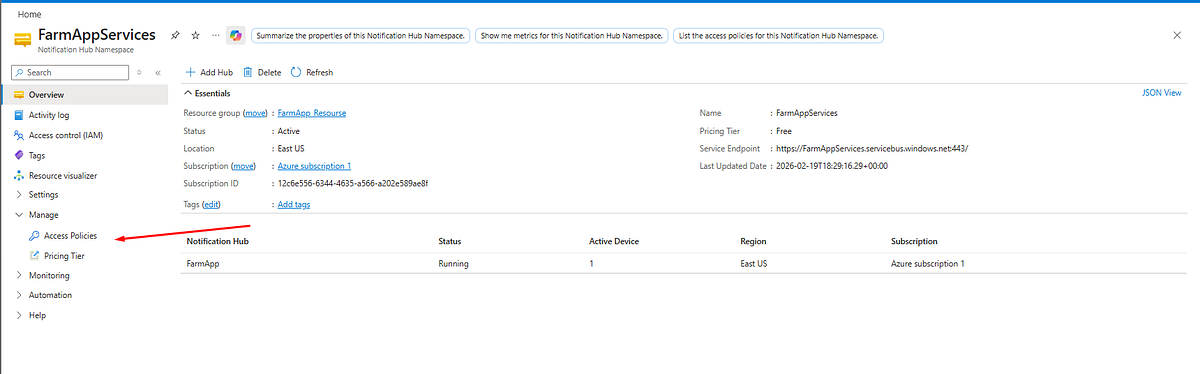
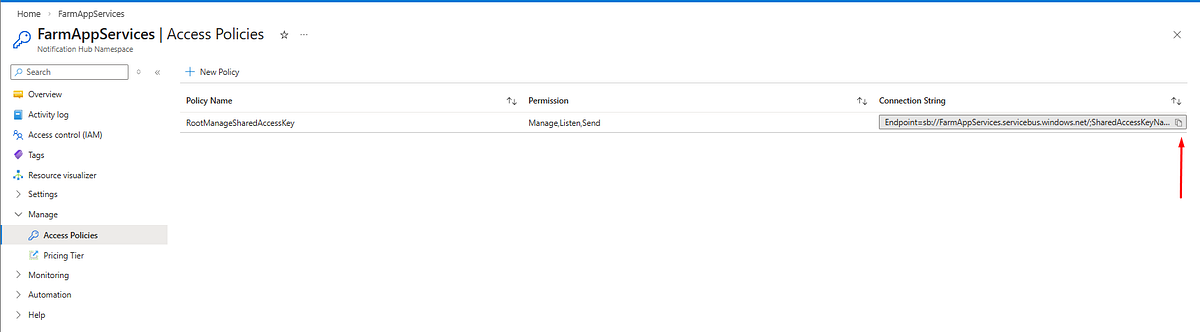
After creation, open your Notification Hub Namespace, navigate to Manage → Access Policies, and copy the Connection String (for example, RootManageSharedAccessKey) and the **Hub Name`. These values are required for backend integration.
Then copy the RootManageSharedAccessKey and store it securely in your appsettings.json or in environment variables (so it isn’t exposed in code or committed to the repository).
Firebase set up (Android)
The first of all on https://console.firebase.google.com/ we create new project for your application and choose android platform
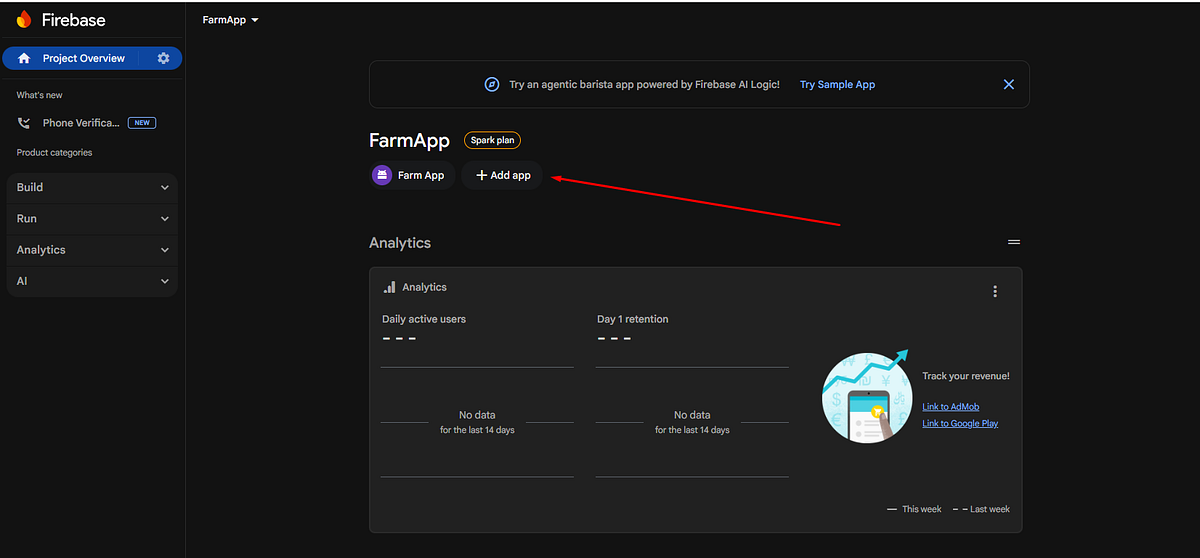
On the first step, you need to add your ApplicationId (the same one used in your MAUI .csproj) to generate the google-services.json file.

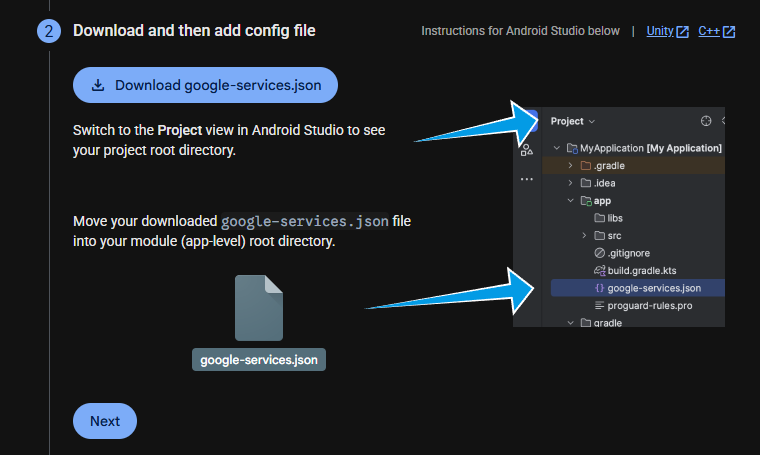
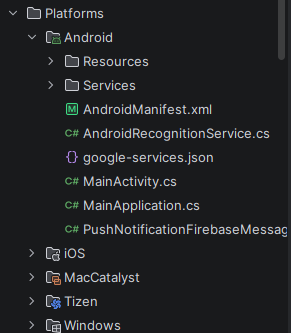
Now dowload the google-services.json and put move it into Platforms/Android in your .NET MAUI project (as shown in the screenshot bottom)
Then you must reference this file in the .csproj so it’s included during the Android build and Firebase can initialize correctly and add the following block to your project file:
This ensures google-services.json is applied only for the Android target framework and enables proper Firebase/FCM push notification configuration.
Then go to Service Accounts to create a private key for Azure. Navigate to Firebase Console → Settings → Service accounts.
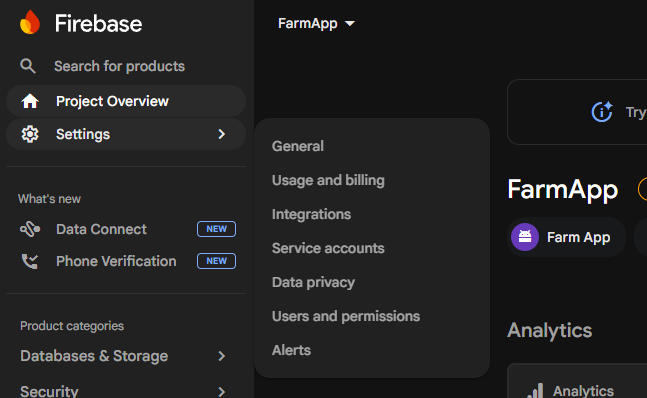
Here press “Generate new private key”. A JSON file will be downloaded to your machine.
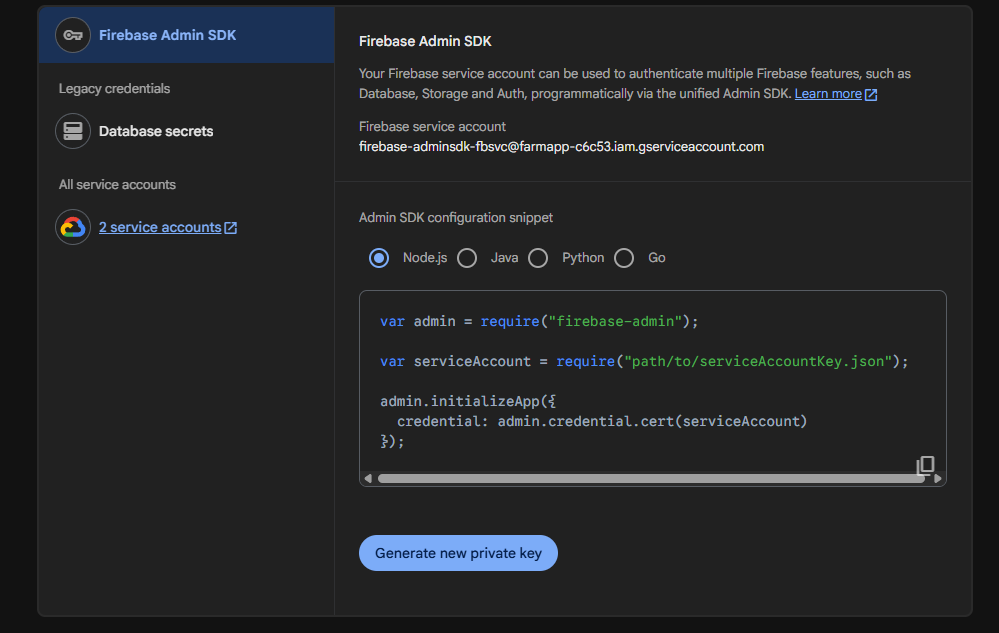
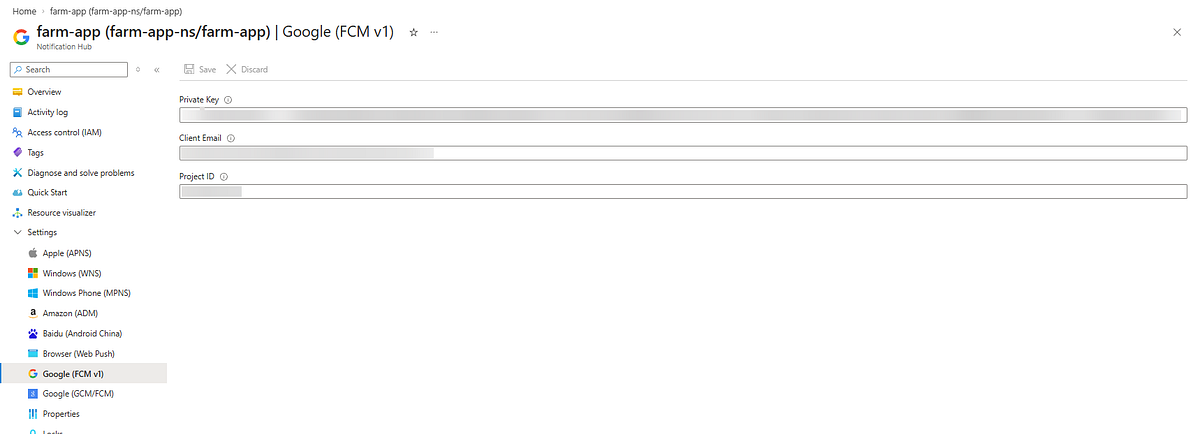
Then open the JSON file and put the data into the FCM v1 fields in Azure. Copy the values from the JSON file into the corresponding fields in Azure Notification Hub -> Google (FCM v1):
- private_key ->Private Key
- client_email -> Client Email
- project_id ->Project ID
Firebase Push Notifications Registration (Android)
Next, add the PushNotificationFirebaseMessagingService. This service is responsible for receiving Firebase Cloud Messaging (FCM) push notifications and handling device token updates. It is registered as an Android Service with the com.google.firebase.MESSAGING_EVENT intent filter, so Android invokes it automatically when a push message arrives or when a new FCM token is generated.
When Firebase issues a new token, OnNewToken forwards it to IDeviceInstallationService via DeviceTokenTcs, so the app can later register or update the installation on the backend. When a push notification is received, OnMessageReceived extracts the title and body from the data payload (with a fallback to the notification payload if not present), initializes a Notification Channel (required on Android 8+), and displays a system notification using NotificationCompat with BigTextStyle for longer message content.
DeviceInstallationAndroidService Implementation (Android / FCMv1)
DeviceInstallationAndroidService is the Android implementation of IDeviceInstallationService. It checks that Google Play Services are available (required for Firebase Cloud Messaging), resolves a stable device identifier using Settings.Secure.AndroidId, waits for the FCM token, and returns a fully populated DeviceInstallation object.
The FCM token is provided via DeviceTokenTcs (typically set from FirebaseMessagingService.OnNewToken). To avoid waiting forever, the service uses a 10-second timeout while waiting for the token; if the token cannot be resolved within that timeframe, an exception is thrown. If the token is retrieved successfully, the service creates a DeviceInstallation with:
- InstallationId = Android device id
- Platform = "fcmv1"
- PushChannel = FCM device token
- Tags = optional tag list used for push targeting
This object can then be used to create or update the device installation on the server side.
Then in MainActivity.cs we must add generation and saving the DeviceInstalletionService
This is an OnSuccess callback: when Firebase/Android API successfully returns a result, we extract the token (result.ToString()), check that it’s not empty, and pass it via DeviceTokenTcs.TrySetResult(token) to whoever is awaiting DeviceTokenTcs.Task (without throwing if the result was already set).
AddOnSuccessListener(this) registers the current class as a success listener for FirebaseMessaging.Instance.GetToken().
The token is returned asynchronously, and once it’s ready, Firebase calls OnSuccess(...), where we extract the token and pass it further (via DeviceTokenTcs) for registration/push setup.
Backend Notification Hub Integration
First, register and implement a service that wraps Azure Notification Hubs. This service is responsible for creating/updating device installations (device token + platform + tags) and sending push notifications.
Below is a cleaned-up version of your NotificationHubService (grammar + small readability tweaks), and then a simple approach that avoids TagExpressionBuilder by using List<string> Tags.
The NotificationTagExpressionBuilder helps us to create the processing the tags from NotificationModel we used Dictionary<NotificationTagsType, HashSet<string>> Tags just for create the build adaptive TagExspression for send on our notification hub but it is not nessasary for you you can use the simple List<string> Tags and in NotificationHubService inside SendPlatformNotifications just use the tags istead of tagExpression
NotificationModel
NotificationModel is used to transfer push notification data from the Admin Console, background jobs, or client applications to the backend, where it is sent through Azure Notification Hub.
The model contains the main notification fields (Title, Message, UrlForRedirection, Platform) and Tags, which enable flexible recipient filtering.
In the advanced approach, Dictionary<NotificationTagsType, HashSet<string>> is used to build complex AND/OR expressions via NotificationTagExpressionBuilder.
If advanced targeting is not required, you can simplify the implementation by using a plain List<string> without an ExpressionBuilder.
Conclusion
I hope this article helps you understand and implement a reliable push notification setup for Android in .NET MAUI using Firebase Cloud Messaging and Azure Notification Hubs. The approach shown here gives you a practical, end-to-end baseline: token retrieval, device installation registration, and correct notification delivery and display on Android.
The example project and pipeline configuration demonstrated in this article are available on GitHub 💻. The sample code and implementation pattern from this article can be reused as a foundation for real projects 🚀. Feel free to adapt it to your architecture, add your own tags for targeting, and extend it with deep links, notification history, or analytics.
If you’d like to connect or discuss push notifications, Azure Notification Hubs, Firebase/FCM, or .NET MAUI mobile development, feel free to reach out to me on LinkedIn 🔗. I’m always happy to share ideas, answer questions, or help troubleshoot real-world cases.