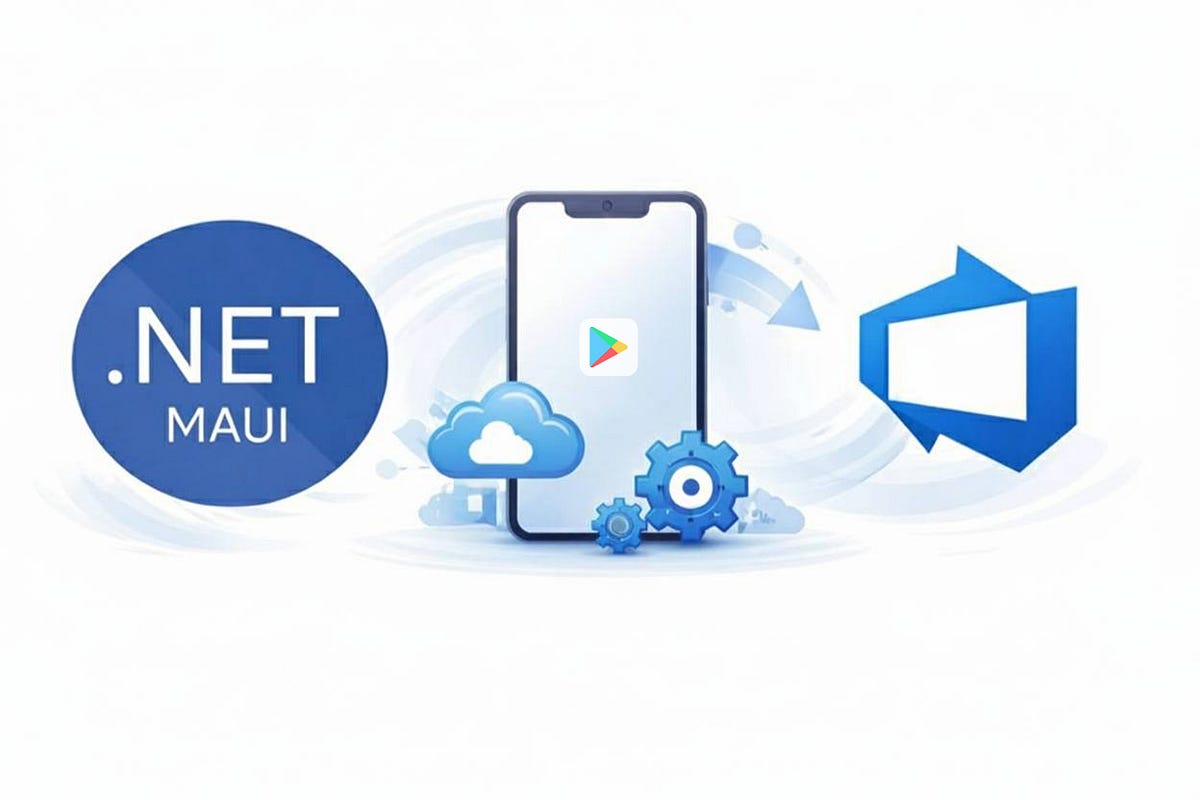
Building and Releasing a .NET MAUI App to Google Play Using Azure DevOps YAML Pipelines


Introduction
Publishing a mobile app to the Google Play for the first time can be difficult. Developers often face questions about certificates, signing, store rules, and how everything works together in a CI/CD pipeline. When you add .NET MAUI and cloud builds to this process, it can become confusing, especially without clear documentation.
In this article, I explain how to build and publish a .NET MAUI application to the Google Play using Azure DevOps YAML pipelines. The guide goes step by step, starting from the project setup and ending with a signed application ready to be uploaded to Play Market.
This article is written for developers who do not have previous experience with mobile app stores. It explains which signing files are required for Android, how to create them, and why they are needed. I also describe how these certificates are used inside Azure DevOps pipelines and how the publishing process works in practice.
By the end of the article, you will understand the full release flow for a .NET MAUI app, from build to store-ready artifacts. You will also get a link to a complete GitHub repository with working YAML pipelines and configuration files, which you can use as a reference or adapt for your own projects.
Android App Signing Basics
Before an Android application can be published to Google Play, it must be digitally signed. Signing proves that the application comes from a known developer and allows Google Play to verify updates for the same app in the future.
Android uses a keystore-based signing system, which consists of a keystore file and several related credentials.
What Is a Keystore
A keystore is a file that stores one or more cryptographic keys.
In Android, the keystore is usually a file with the .keystore or .jks extension.
This file:
- uniquely identifies you as the app publisher
- is required for every release build
- must be kept safe and backed up
If you lose the keystore used for publishing, you cannot update the app under the same package name.
Android Signing Properties Explained
Android Signing Key Alias
The key alias is the name of a specific key stored inside the keystore. A single keystore file can contain multiple keys, each identified by its alias.
When signing the app, Android needs to know which key inside the keystore to use.
Android Signing Store Pass
This is the password for the keystore file itself. It protects access to the keystore and is required before any key inside it can be used.
Android Signing Key Pass
This is the password for the specific key (alias) inside the keystore. In many cases, the keystore password and key password are the same, but they do not have to be.
Understanding the First Upload and App Signing Process
After creating your keystore and configuring your build pipeline, the next step is simple: build your app using this keystore and upload it to Google Play Console.
The first upload is important because Google Play associates your application with a signing setup. From this moment on, the same keystore must be used for all future uploads of the app. If a different keystore is used, Google Play will reject the update.
By default, Google Play enables Play App Signing, and this option is strongly recommended. With Play App Signing enabled, the keystore you use in your local environment or CI/CD pipeline acts as an upload key. The actual app signing key is securely stored and managed by Google Play and is not visible to the developer.

This setup makes the publishing process safer. If you lose your keystore, it is not the end of the world. You can request an upload key reset directly in Google Play Console.
After the request is approved, you can register a new keystore and continue uploading updates normally.
Even with Play App Signing enabled, your keystore should still be stored securely and backed up. It is required for every upload and is an essential part of the automated release process.
Important Note About Application Package ID
Before going further, it is important to understand what the Android Package ID is. The package ID (also called applicationId) is a unique identifier of your Android application. Google Play uses it to distinguish your app from all others, and it never changes during the lifetime of the app. Once an app is published, the package ID becomes permanently associated with that application, and all future updates must use the same value.
One practical detail to be aware of: it is better to avoid using hyphens (-) in the Android package ID.
While Google Play itself accepts package names with hyphens and works correctly, the Azure DevOps task used to upload apps to Google Play may fail when a hyphen is present in the package ID. This can result in confusing upload errors even though the app is valid.
To avoid this issue:
- use only lowercase letters, numbers, and dots
- follow the standard Android package naming format
This small decision can prevent unnecessary pipeline failures later.
Google Play Service Connection
We need to configure Google Play service connection, which acts as a bridge between the Azure DevOps pipeline and Google Play Console. This connection allows the pipeline to authenticate securely and upload .aab files without any manual interaction during the release process.
This setup is required only once per project and is based on a Google Cloud service account.
This integration is based on a Google Cloud service account. A service account is a special type of account designed for automated systems rather than human users. In this setup, the service account represents Azure DevOps itself, allowing the pipeline to act on our behalf when uploading builds to Google Play.
You need to go to Google Cloud Console to IAM & Admin page and create new Service Account (see pictures below).

Click Create Service account button

Type in name and description of the service account and submit form to create it.

Now you need to switch to Keys tab of the Service Account and create new Key as it is shown below. We’ll use the key later in Azure DevOps to create service connection.

Google assigns an email address to the service account. This email uniquely identifies the service account, as it will be used in the next step in Google Play Console (see picture below).

At this point, the service account exists, but it still has no permission to upload apps. Google Play does not automatically trust service accounts created in Google Cloud. Access must be granted explicitly inside Google Play Console.
To do this, we open Users and permissions in Google Play Console and invite a new user (see picture below).

Instead of entering a personal email address, we use the email of the service account created earlier. Although this looks like a regular user invitation, this is the correct and expected way to link a service account to Google Play (see picture below).

When inviting the service account, permissions must be assigned. For automated uploads from Azure DevOps, the required permissions are “Release apps to testing tracks” and “View app information and download bulk reports (read-only)” (see pictures below). Those permissions allow the pipeline to upload .aab files and create releases in internal or testing tracks. Permissions can be granted either for a specific application or for the entire developer account, depending on how broadly the pipeline should be allowed to operate.


After the invitation is accepted and permissions are applied, the service account becomes a fully authorized uploader. Together with the JSON key generated earlier, it provides everything Azure DevOps needs to authenticate and upload builds to Google Play.
Enabling the Google Play Android Developer API
Before running the pipeline for the first time, the Google Play Android Developer API must be enabled in Google Cloud. This API is required for any automated upload to Google Play, including uploads from Azure DevOps.
The API is enabled in Google Cloud Console, not in Google Play Console.
To enable it, open Google Cloud Console, make sure the correct project is selected (the same project where the service account was created), and navigate to APIs & Services → Library. In the API library, search for Google Play Android Developer API, open it, and click Enable (see picture below).

After enabling the API, it may take a few minutes for the change to propagate. Once this API is enabled, Azure DevOps will be able to communicate with Google Play using the service account, and the upload step will work correctly.
With this configuration completed, all prerequisites are now in place. We can move on to the Azure DevOps YAML pipeline itself and see how the Android build, signing, artifact publishing, and Google Play upload work together end to end.
Creating a Google Play Service Connection in Azure DevOps
To allow the pipeline to upload Android builds to Google Play, we now need to create a Google Play service connection in Azure DevOps. This service connection defines how Azure DevOps authenticates with Google Play when the pipeline runs.
The configuration starts in Azure DevOps under Project Settings → Service connections. From there, we create a new service connection and select Google Play as the connection type. If everything is set up correctly, Google Play will be available in the list of supported service connections (see picture below).

If Google Play does not appear in this list, it means the required integration has not been installed yet. Google Play support is provided through an extension from the Azure DevOps Marketplace. In this case, you need to open the marketplace and install the Google Play extension before continuing. The extension is available here: you can open the marketplace by the next link: https://marketplace.visualstudio.com (see screenshot below)

After the extension is installed, returning to the service connections page will show Google Play as an available option. In the form of service connection creation, you need to insert email of Service Account that we created in Google Cloud before. Similarly, Private Key can be found in Key JSON file that we downloaded for the Service Account before (see picture below).

Once the service connection is saved, it can be referenced by name in the YAML pipeline. From this point on, Azure DevOps can authenticate with Google Play and upload signed .aab files without any additional manual steps.
Android Build and Release Pipeline
Now that the Google Play service connection is configured, we are ready to move on to the Azure DevOps pipeline itself. In this section, we will prepare everything required to build a signed Android App Bundle and make it ready for upload to Google Play.
Before the pipeline can run successfully, we need a keystore file that will be used to sign the Android application. We can use a keytoolcommand-line utility. When generating the keystore, the tool will ask for a keystore password, a key password, and some basic information about the application owner. Key alias, key password, and store password are required later by the pipeline to sign the app correctly, so make sure you save them in a safe place. Below is the command for generating the keystore.
Once the keystore file is created, it should not be stored in the repository. Instead, Azure DevOps provides a secure way to store sensitive files. The keystore is uploaded to Secure Files in Azure DevOps, where it is encrypted and only accessible to pipelines that explicitly request it. The screenshot below shows where the keystore file is uploaded in the Azure DevOps UI.

With the keystore stored securely, we can define the pipeline. The full YAML listing is shown below.
Also, configuration in the MAUI app .csproj is important, for Release build configuration, we should have the following list of parameters configured (see listing below).
It is worth paying attention to how versioning and signing configuration are handled in this setup.
The application version follows a three-number format. The first two numbers represent the main application version and are controlled manually. They are defined using the baseVersion variable in the pipeline and also reflected in the pipeline name (third line in the pipeline above). These numbers are increased only when a new feature set or a larger update is released.
The third number is generated automatically on every pipeline run using the build ID. This approach is important because Google Play requires every uploaded version to be strictly higher than the previous one, even if the change is small. With this setup, minor fixes or small updates automatically produce a valid, incremented version without any manual intervention.
Signing configuration is another important part of the pipeline. The Android signing parameters are not stored in the repository and are not hardcoded in the project file. Instead, they are passed to the build command using MSBuild properties:
These values are defined as pipeline variables in Azure DevOps. The keystore file is downloaded from Secure Files during the build, and all passwords are stored as secure variables, so they are not visible. This keeps sensitive data out of source control while still allowing the pipeline to sign the app automatically (see picture below).

The pipeline also includes a step that publishes the generated .aab file as a build artifact. This makes the signed App Bundle downloadable directly from the Azure DevOps build page. Having the artifact available is important in case the Google Play service connection is temporarily unavailable. In the picture below, you can see where you can download the build artifact after the pipeline completes its execution.

While the application version is defined in the project file, Android also requires explicit values for versionCode and versionName inside AndroidManifest.xml(see picture below). These values must be updated for every release; otherwise, Google Play will reject the upload.

To support the versioning strategy described above on the Android side, the pipeline uses an additional task called android-manifest-version@1. The android-manifest-version task updates these values automatically during the pipeline run. It generates a new versionCode based on the build ID and sets the versionName to match the application version used in the build. This ensures that every generated .aab has a unique and valid version that complies with Google Play requirements, without the need to edit the manifest file manually.
This task (android-manifest-version) is not included in Azure DevOps by default. It is provided by an extension called “Mobile App Tasks for iOS and Android” by James Montemagno. The extension must be installed from the Azure DevOps Marketplace before the pipeline can run successfully. Once installed, the task becomes available for use in YAML pipelines, allowing Android versioning to be handled in a consistent and automated way (see picture below).

It is worth mentioning that the CI/CD pipeline is configured to deploy application builds directly to the Internal testing track in the Google Play Console by setting the deployment track parameter to internal.
With this task in place, the pipeline fully manages Android versioning, signing, and packaging, making the release process repeatable and predictable.
First Pipeline Run
When the pipeline is run for the first time, Azure DevOps will ask for permission to access the keystore file stored in Secure Files. This is expected behavior and is part of Azure DevOps security model.
Because the keystore is a sensitive file, pipelines are not allowed to use it automatically without explicit approval. During the first run, Azure DevOps pauses the pipeline and displays a prompt asking to allow access to app.keystore. After confirming this permission, the pipeline continues normally (see picture below).

This approval is required only once. Once access is granted, subsequent pipeline runs will be able to download and use the keystore without additional confirmation. The screenshot below shows the permission prompt that appears during the first execution
A Note About the App in Draft State
There is one important detail about uploading a brand-new app to Google Play that is worth explaining.
When an application is created for the first time in Google Play Console, it exists in a draft state. In this state, automated uploads from CI/CD pipelines may fail, even if the app is correctly signed. App remains in draft state until you fill necessary forms with app information on Google Play Console (see screenshot below).

To upload builds while the app is in draft state, you need to add isDraftRelease: trueproperty to GooglePlayRelease@4step while the app remains in draft state (see listing below).
Deployment Result in Google Play Console
Once the pipeline execution finishes, the application build is available in the Google Play Console under the Internal testing track. From there (see picture below), the app can be shared with internal testers for validation or promoted to other tracks, including production, using the standard Google Play release workflow.

Conclusion
I hope this article proves helpful for developers looking to understand and implement a reliable CI/CD pipeline for deploying .NET MAUI applications to the Google Play ecosystem. The approach described here provides a practical foundation for automating builds and safely delivering them to the Internal testing track while staying aligned with Google Play’s publishing workflow.
The example project and pipeline configuration demonstrated in this article are available on GitHub 💻. Feel free to explore the repository, run the pipeline yourself, and adapt it to your own projects. Suggestions, improvements, and alternative approaches are always welcome.
If you’d like to connect or discuss CI/CD pipelines, mobile deployment, .NET MAUI, or hybrid app development, feel free to reach out to me on LinkedIn 🔗. I’m always happy to exchange ideas, answer questions, or collaborate on interesting challenges.
Thank you for reading, and happy deploying! 🚀